How to Choose the Best Solar Powered Outdoor Lights?
Solar Powered Outdoor Lights can illuminate a path, porch, or garden without trenching cables or adding another outlet. But choosing well takes more than comparing prices. A lamp that looks bright in a showroom may feel dim beside a wide driveway, while a small panel can struggle after several cloudy days. The right choice depends on the space, local sunlight, and how you plan to use the light.
The wider energy trend offers useful context, not a buying shortcut. IRENA’s Renewable Capacity Statistics 2025 reports that global renewable power capacity reached 4,448 gigawatts in 2024, with solar accounting for about 452 gigawatts of additions. That growth shows how quickly solar technology is expanding. It does not guarantee that every outdoor light will perform well. For the light source itself, the U.S. Department of Energy notes that LEDs use at least 75% less energy than incandescent lighting and can last much longer. Efficient LEDs help, but battery capacity, panel size, and build quality still matter.
That matters. A good choice should match brightness to the task, from soft entry lighting to a motion-triggered security beam. Check the stated lumen output, battery runtime, weather-resistance rating, and whether the panel can sit in direct sun. But sunlight varies. Winter shade, tree cover, and cloudy weather can change real-world performance. There is no perfect specification sheet; even a well-reviewed model may disappoint in a shaded corner. This guide explains what to compare, which features deserve attention, and how to choose Solar Powered Outdoor Lights that suit your space rather than just the product photos.
Define the Lighting Task: Compare Lumens, Beam Angle, and lm/W
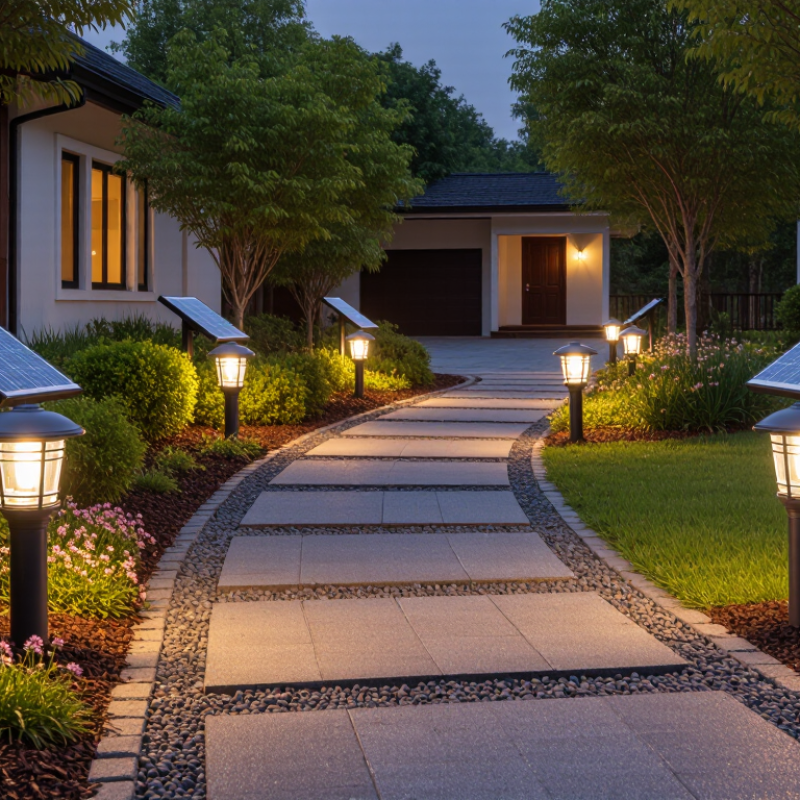
For a garden path, aim for even, low-level guidance; a doorway or shed entrance needs a brighter, more focused pool of light. Lumens measure total visible output, not brightness on the ground. A narrow beam concentrates that output, while a wide beam spreads it across more area. Check the beam angle and mounting height together. A 120-degree beam mounted high may create broad coverage, but leave the path dim.
Look for illuminance information in lux when available, especially for steps and entrances. The Illuminating Engineering Society’s guidance treats lighting levels as task-dependent, so avoid choosing by lumen count alone. A spec sheet can mislead. Compare lm/W, too: it shows how much light a fixture produces per watt. The U.S. Department of Energy’s 2022 Solid-State Lighting R&D Opportunities report notes that leading white LED packages have exceeded 200 lm/W in laboratory demonstrations. A complete solar fixture may perform much lower because its optics, driver, panel, and battery affect output.
Compare complete fixtures at the same operating mode, not just bare LED-chip figures. Check whether stated lumens apply after dusk or during a brief boost mode. Then picture the beam on your actual surface: gravel, wet paving, and pale walls reflect light differently. I would leave some margin; published figures rarely describe every garden.
Compare Solar Panels: Monocrystalline PV Modules Commonly Exceed 20% Efficiency
When choosing solar powered outdoor lights, compare the panel, not just the brightness claims.
Monocrystalline photovoltaic modules commonly exceed 20% efficiency, according to commercial module data summarized in Fraunhofer ISE’s Photovoltaics Report (2024). That means more sunlight can become electricity from a given panel area. Useful when the fixture has a small panel.
Keep cell records separate from module performance. NREL’s Best Research-Cell Efficiency Chart tracks laboratory cell results, not the efficiency of complete outdoor-light panels. A tiny panel may also perform poorly if it sits beneath leaves, faces away from the sun, or collects dust. Efficiency alone can mislead.
Check the panel’s rated output and how it performs in your actual spot. A narrow porch ledge may receive only a few hours of direct sun, even on a clear day. Battery capacity and light runtime matter too. More panel efficiency cannot fix a shaded location. I’d compare specifications, then observe the site for a day; that step is easy to skip, and my estimate may still be imperfect.
Sources: Fraunhofer ISE, Photovoltaics Report (2024); NREL, Best Research-Cell Efficiency Chart.
Size the Battery: Watt-Hours = Volts × Amp-Hours; Check Rated Runtime
When comparing solar lights, look beyond panel size and check the battery’s watt-hours. Multiply battery voltage by amp-hours: a 3.2-volt, 6-Ah battery stores about 19.2 Wh. That figure helps you compare models with different voltage ratings. It is stored energy, not a promise that every watt will reach the lamp. Conversion losses and battery limits reduce usable capacity.
Do the math. If a light draws 2 watts, 19.2 Wh suggests roughly 9.6 hours under ideal conditions. Real runtime may be shorter, especially after cloudy days, in cold weather, or as a battery ages. Check the maker’s rated runtime and the conditions behind it, such as brightness setting and charging time. A “12-hour” claim may refer to a dim mode, not full brightness. Read the fine print.
Think about your evenings. If a path needs light until midnight, compare that schedule with the rated runtime at your preferred brightness, then allow some margin for weak charging days. I would not treat a calculation as a guarantee; outdoor conditions are messy. A simple runtime test in your own yard can reveal whether the light stays useful after dusk.
How to Choose the Best Solar-Powered Outdoor Lights
Size the battery: Watt-hours (Wh) = volts (V) × amp-hours (Ah). The chart compares theoretical runtime for different battery sizes, assuming a steady 1-watt load.
For example, a 3.2 V, 3 Ah battery stores 9.6 Wh, providing about 9.6 hours at a 1 W load in ideal conditions. Check the light’s rated runtime, too: real runtime can be shorter because of energy losses, temperature, battery age, and brightness settings.
Verify Weather Protection: IP65 Is Dust-Tight and Water-Jet Resistant (IEC 60529)
When choosing solar powered outdoor lights, check the IP rating on the fixture and its documentation. IP65 means the enclosure is dust-tight and resistant to water jets, according to IEC 60529. It does not mean the light can be submerged. Nor does it promise protection from every storm, temperature swing, or aging seal. Small details matter: inspect the seams, cable entry, and battery compartment, especially where water could collect. A rating is useful, but installation still counts.
Tips: Confirm that IP65 applies to the complete assembled light, not just one component. Keep the solar panel and joints positioned as instructed. After installation, look for loose covers or damaged seals. Easy to miss.
Think about the actual spot before buying. A light beneath a deep eave faces different exposure from one beside an open garden path. Dust, wind-driven rain, and repeated temperature changes can wear down materials over time. I would not treat IP65 as a reason to ignore maintenance; that assumption is tempting, but not very practical. Check the enclosure periodically, and replace parts if cracks or gaps appear. A few minutes of inspection can help you spot trouble before moisture reaches the electronics.
Assess Controls and Coverage: Check Motion-Sensor Range and Detection Angle
A solar light’s motion sensor should cover the path people actually use, not just the area shown in a product diagram. Check both its stated detection range and horizontal angle. For example, a theoretical 120-degree cone reaches about 10.4 meters across at a three-meter distance; real detection may be narrower because of obstacles, mounting height, and movement direction. Treat that geometry as a planning estimate, not a promise. U.S. Department of Energy Federal Energy Management Program guidance notes that passive infrared sensors need an unobstructed line of sight. A fence, shrub, or parked vehicle can therefore create a blind spot.
Range alone can mislead. A sensor may detect a person walking across its view more reliably than someone approaching it head-on. Test the light after installation: walk the route from several directions, including near the driveway edge and beside steps. Notice where the lamp activates, and whether passing traffic triggers it unnecessarily. I would not assume the advertised angle matches a real yard; that is an easy mistake to make.
Tips: Aim the sensor slightly across the approach, rather than straight down the path. Clear branches from its view, then adjust sensitivity and timer settings. Recheck on a cloudy evening, when the light may have less stored energy.